Having an effective way to hang hockey gear after games and practices allows it to dry and keep “that hockey smell” to a minimum. This hockey gear drying stand is a quick DIY project and is completely customizable!
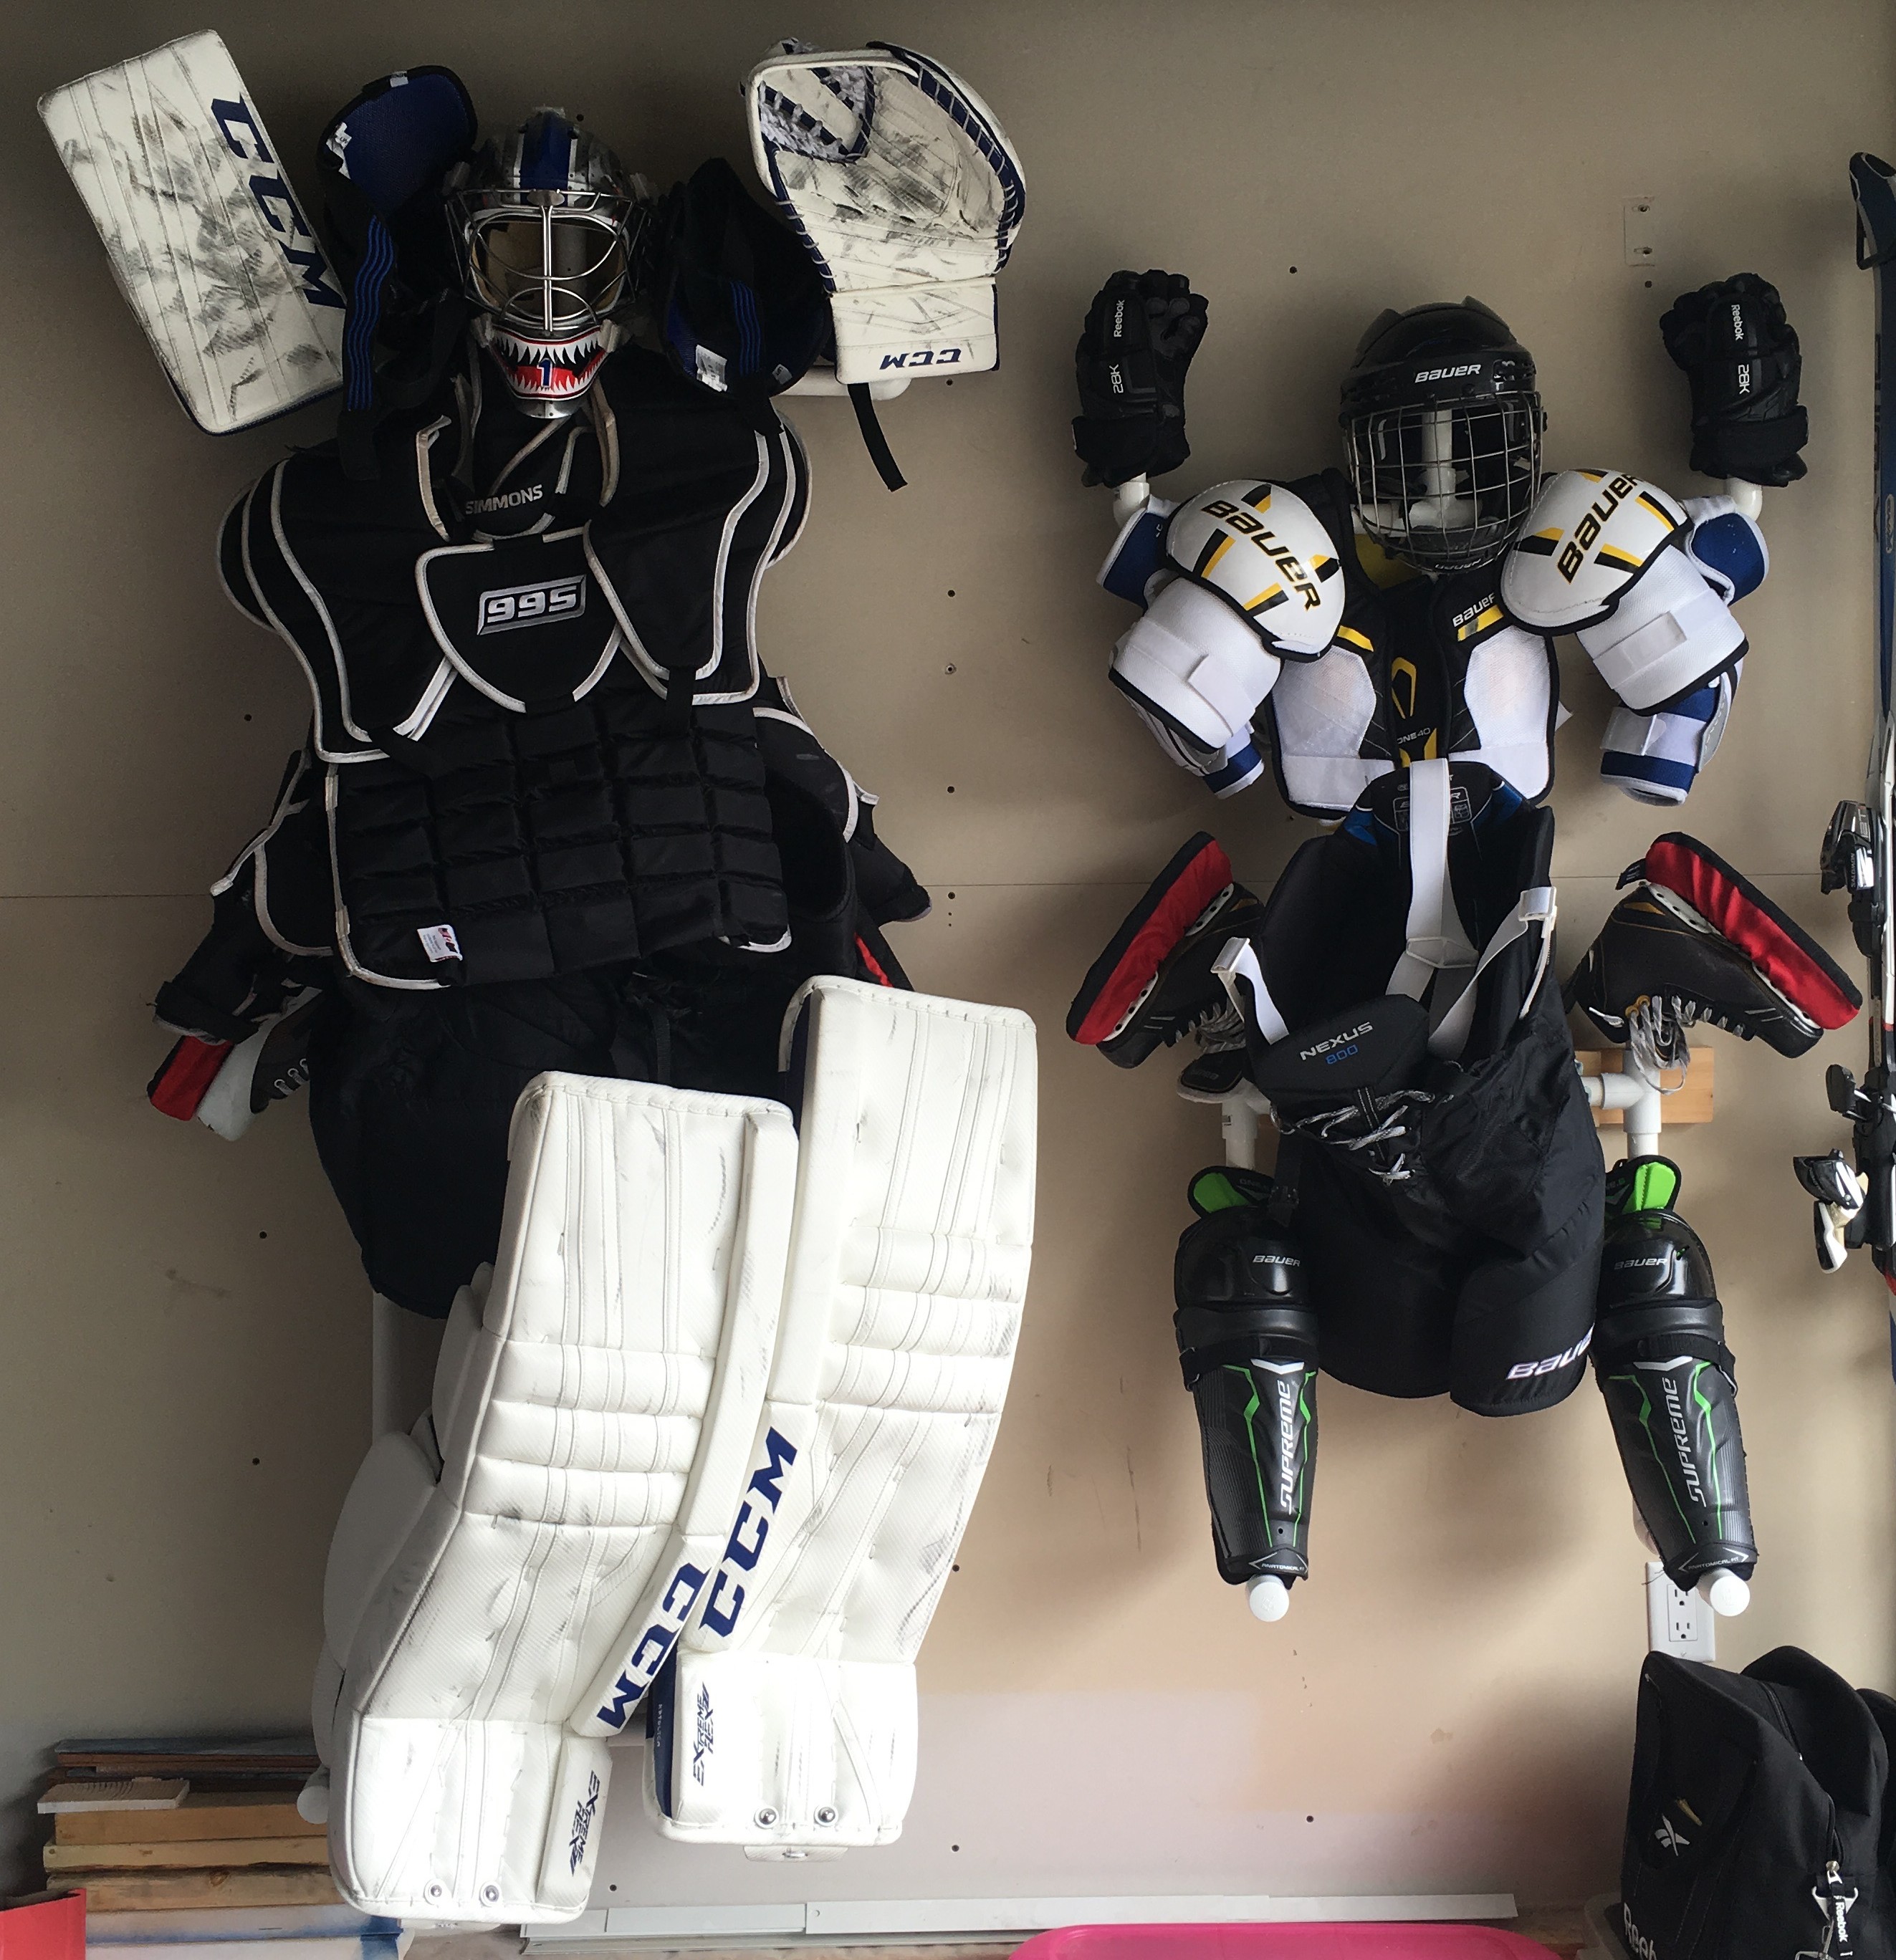
 Main Image: Left: Goalie (His), Right: Player (Hers)
There are a few ways to configure this hockey gear drying stand. The player measurements (P) are for average sized gear (I’m 5’5″ and it fits mine with space to spare) and I’ve included alternate measurements for goalie gear (G) as well (for reference, my husband is a goalie and he wears pads that are 34 + 3).

Materials Needed:
- PVC Pipe (I used 1″)
- PVC Glue
- PVC Pipe Joints for Player: 7-9 caps, 4 elbows, 2 + joints, 2-4 T joints
- PVC Pipe Joints for Goalie: 7-9 caps, 4 elbows, 2 + joints, 2-4 T joints
- Hack Saw or Jig Saw
- Drill + bits
- Hooks (optional)
- Metal Strapping (optional)
- Screws (to secure hooks, metal strapping, 2″ x 4″ boards)
- 2″ x 4″ boards (optional for wall storage)
Directions:
- Using a hack saw or jig saw, cut the lengths of PVC pipe to lengths shown in diagram. Note: If you are taller or shorter, you can alter the lengths to fit your own gear. For Goalie Stand (G): Include the optional cross-brace shown at the bottom – this gives something for the pads to rest on.
Additional Pieces: For a free standing stand, see notes below under “Storage”.

- Perforation: Drill holes to perforate caps and pipe lengths for additional airflow. Use your discretion for this as not all pieces of gear will require additional air flow.
- Assembly: Glue pipe pieces and joints together, ensuring they are lined up properly. Careful – PVC glue dries quickly! Also, ensure you are in a well-ventilated area for this.
- Hooks: I added a hook for hanging pants midway up the centre post (the height of this will depend on how long your pants are, how far down you want them to hang, etc.). You can also add hooks or clips to the bottom lengths for shin pads. For Goalie Stand (G): I added a hook on each skate pipe right above the T-joint to hang pads more securely.

Storage:
- Hanging (shown in main): We chose to hang ours on the wall (in studs of course!), using small lengths of 2″x4″ boards to hold the stands away from the wall, This allows for additional airflow as well as space for attaching gear to the posts, throwing shoulder pads over, etc. We used yard-tool hooks and metal strapping to secure the stands to the wall.
- Free Standing: For a free standing alternative, convert the bottom-most elbow joints to T-joints and attach an extra length of PVC pipe coming out the back. This will give the stand the stability it requires to stand on its own.
Airflow & Faster Drying:
For quick drying, attach a fan to the bottom of the centre +joint to blow air throughout and dry gear faster. This is great for back to back games and/or tournament play.


