For whatever reason, the smallest room in my home seems to have taken the longest to renovate! If you’ve been following along on Instagram stories, you already know my renovation plight.

I’d chosen everything for the powder room months ago. I had everything ready to go so all we had to do the demo, paint and install everything, right? Wrong. Sometimes things just aren’t that simple. With that in mind, I’m sharing the drama of what happened during our powder room reno (with photos!) with tips and tricks on what to avoid and what to expect!
Here are some of the snags we hit when renovating our powder room…

Our demolition was fairly straightforward: disconnect and remove the toilet, disconnect and remove the pedestal sink, remove the sconce and mirror. Simple enough. We used several shims to remove the glued on mirror without damaging it…the wall was another story.

What did I do with the old fixtures? I sold them on Kijiji. I listed the toilet, sink with faucet, mirror and sconce and someone came and picked up the entire set. For real. If you don’t want to bother, inquire at your local Re-Store to see what they will take off your hands before opting for the landfill.

We brought in an electrician to re-route the placement of the light fixture. We were switching from a wall-mounted sconce to a ceiling mounted set of pendants. This was inexpensive and took the electrician less than an hour to do.
The next step involved patching and filling any holes in the drywall, sanding and prepping for paint. I proceeded to paint 3 of 4 walls and was excited to be nearing the finish line!
Insert set of snags here…
We planned to do wallpaper on a feature wall in the space and found a discounted peel-and-stick product that we thought would be easy enough to install. First of all, neither my husband nor myself had ever installed wallpaper before, but we watched a few YouTube videos and it looked so easy (lies! the internet lies!).

We set out to install the wallpaper and it was a nightmare. For one, our walls aren’t perfectly square (naturally) and to top it off, it was such a difficult feat getting this stuff up on the wall.

So as you see above, slight disaster. We found a local handyman to come and install this product for us. He did a great job, but the wallpaper itself looked gawdawful! It looked like we’d taken contact paper and put it up on the wall, or 1970s mactac. I was going for an elegant, casual glam vibe…not a tacky, cheap looking reno. Sure, it photographs nicely here, but up close and in person, it was a different story.

This photo doesn’t show how poor the peel-and-stick wallpaper looks but needless to say, it was time to peel it off and look for another solution. So we in fact peeled it off…along with the paint that was behind it, so guess what?! We got to repair the walls a second time!

We spoke to a wallpaper installer and their advice was to go with traditional wallpaper because it was a thicker product and would look nicer overall.
Wayfair was of course my go-to option. I prefer to shop for things online in the comfort of my pjs and there was a glass of wine sitting next to me as I scoured their site for a solution for my walls. I filtered my search by “Non-Pasted” meaning that the installer would have to use glue to adhere it to our walls. Wayfair had tons of options for me to choose from and they were all affordable. They even have a square footage calculator to let you know how many rolls you’ll need!
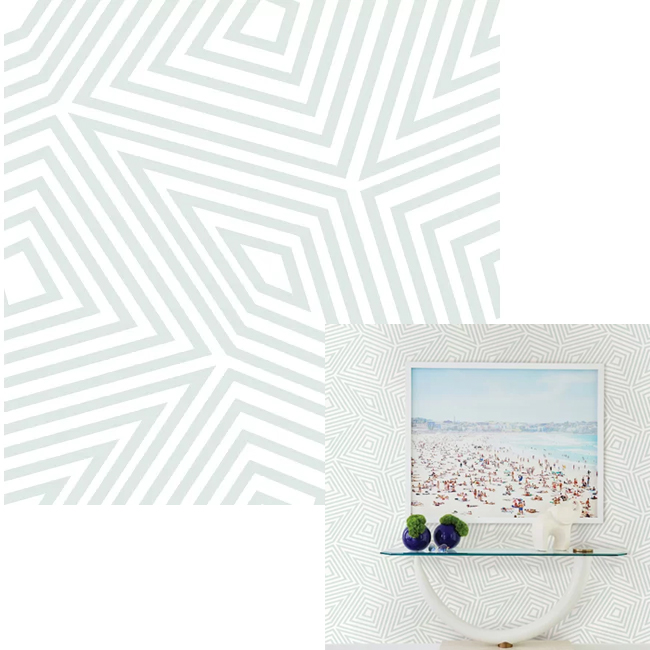
I found this gorgeous pattern from the Sarah Richardson collection and I was sold. I ordered it up and anxiously waited for its arrival. Full disclosure: I have followed Sarah Richardson for years and basically love everything she does, so I was very excited about what this wallpaper would be like. It delivered – it was prettier in person than online and it was an even nicer pattern than my original peel-and-stick choice.
The installer came the day the wallpaper arrived and had it up in less than an hour! I was immediately in love and couldn’t wait to finish the project! TIP: many installers charge per square foot, so that is a great way to determine your installation costs for your renovation budget.

Now all we have to do is get some fixtures in here, connect all the plumbing, and we should be good to go! Check out my next post to view the Full Reveal: My Power Room.


